
So, you want to play some Path of Exile on your Chromebook.
It’s no surprise.
I mean PoE is like one of the best (free) MMORPGs of all time.
A lot of people think that Chromebooks aren’t compatible with PoE.
They’re mistaken.
Don’t believe the naysayers.
In this tutorial, we’re going to install PoE on your Chromebook (believe it or not).
The only issue will be whether or not your laptop can handle running the game (potato or not).
Sound good? Let’s get started!
Last updated: 2/26/23. Path of Exile has released multiple updates throughout 2020 and is scheduled to release Echoes of the Atlas in early January. The game is still going strong.
Why would you play Path of Exile on a Chromebook?

If you don’t really care about what makes this game awesome, feel to skip this section and go to the next one!
If you’ve played the game before, you already know that it’s an awesome game. Grinding Gear actually listens to community input and has been evolving the game to meet players’ demands without destroying it.
It’s often compared to World of Warcraft as being one of the best MMORPGs in 2018 as a free alternative. And WoW is often titled the best MMORPG of all time, though it’s a paid subscription-based game.
(If you’re also a WoW player, you may want to check out this tutorial on installing and playing World of Warcraft on your Chromebook as well.)
The game is completely free to play with no pay-to-win advantages. It does have microtransactions (or else how would they make money?), but they’re purely cosmetic and don’t offer anything that would give a paying player an unfair advantage over a free player.
Though if you like the game, you should definitely support the developers by buying an awesome skin here and there.
Being such an awesome game, it’d make sense for any PoE fan (you, probably) to want to run this game on their Chromebook. Whether you want to play it at school, work, or out in public to get your dungeon on, your Chromebook would be the perfect candidate.
So, without rambling about why PoE is awesome, let’s go ahead and get the game installed on your Chromebook.
Update: This method still has been reported working and there are many different ways to get the game installed. You can use Lutris, Steam, and PlayOnLinux. The methods are covered here in this tutorial. Leave a comment if you need help.
For 2023, expect the latest updates to bring a bunch of returning players back for this expansion season. It still runs like a champ on newer Chromebooks without any issues. I still play it on my old Acer CB3-131, albeit at a lower framerate.
With 3.21 released, the game still runs just fine. The FPS is pretty terrible at times though, but so is 2GB of RAM. Not to mention Path of Exile 2 coming out this year too. But will PoE2 run on CBs? Probably not.
Stick with Steam for best results.
Chromebook system requirements to play Path of Exile
Path of Exile is a pretty modern game that takes full advantage of multi-core processing and modern graphics cards.
Integrated graphics
As you probably know, Chromebooks aren’t exactly the most powerful laptops around.
They’re not made for playing games like PoE, but rather light to moderate games from the Chrome Web Store, which has tons of games ranging across all genres like FPS, MMORPGs, Strategy, and even offline games. Or you can play thousands more from the Google Play Store.
(Don’t have access to the Play Store? Get the update.)
They’re definitely not made for playing modern AAA games, though.
As such, they don’t have dedicated graphics cards. The majority of Chromebooks run Intel HD Graphics, which is basically an integrated graphics card that’s shared with the CPU. It’s a co-processor- if you want to be precise.
Weak processors
And the majority of processors in Chromebooks aren’t too powerful either.
If you have an older model, you probably have an Intel Celeron processor. This is typically just barely enough power to run the game. Newer Chromebooks have much more powerful CPUs- some have Intel i5 processors and Intel m3 CPUs as well.
So, you need to make sure your specific model has decent hardware before attempting to do this. Or just do it anyway and try it. The whole “playing modern games on a Chromebook” thing is still a gray area.
It may work just fine with your older Chromebook if you adjust the in-game graphics a little. Then you’ll be playing PoE no problem. Turn everything to the lowest possible settings. You’re not trying to get 3 FPS for shiny graphics at 1080P, right?
How to install Path of Exile on a Chromebook

The guide will be divided into several parts. In essence, here’s what we’ll be doing:
- Back up your stuff
- Switch over to Developer Mode
- Download Crouton
- Install Linux
- Download Lutris
- Install Lutris
- Install Path of Exile
- Play!
To get this working, you’ll have to do the steps in order. Jumping around probably won’t work, unless you’ve already started and you’re looking for a path to continue on.
Anyway, now that you know the lowdown, how about we get to the auction process of installing Path of Exile on your Chromebook?
Let’s roll.
Backing up your data
This is the first step before we switch on Developer Mode.
It’s important that you back up your data because once you get started, there’s no going back!
Turning on Developer Mode will wipe pretty much everything on your Chromebook’s hard disk so it’s just like it was restored to factory settings. So it’ll be like when you first booted it up- with nothing on the disk.
This means everything saved locally on your hard disk will be erased, including:
- Everything in your Downloads folder (images, videos, documents, text files, etc.)
- Custom folders and directories you’ve created
- Your personalized Chromebook settings
- All installed Chrome Web Store apps (assuming you have Chrome Sync disabled)
- All installed Google Play Store apps
So if you have anything important you want to save from getting deleted, take this chance to back up your stuff!
You have a few options when it comes to saving your data.
Backing up to a cloud provider
You can easily save all your stuff to a cloud server like Google Drive or Dropbox– both of which are free to use (and can be upgraded to a premium plan should you need more space).
If you’ve never heard of cloud storage, it works just like a virtual external hard drive that’s always on and always accessible. You can access your data anywhere with an Internet connection and is also very secure.
Your data is “uploaded” to your cloud provider’s servers and you can access and “download” your data from their servers anytime you want. It’s pretty much like a NAS (Network Attached Storage) setup.
Google Drive works very well with Chrome OS. You can download the Google Drive app from the Chrome Web Store and use it easily back up your stuff. You also get extra storage for free for buying a new Chromebook.
I wrote a tutorial you can check out with step-by-step instructions on how to back up your Chromebook to Google Drive.
Backing up your data to an external storage device
You can also use the tried-and-true traditional storage medium as well.
Chrome OS is compatible with the majority of external drives (like external hard drives, thumb/flash drives, and SD cards). Just plug it in and launch the Files app using your Launcher. Navigate to the files you want to back up and transfer them over to the external storage.
I’m assuming you’ve done this before on a Windows or Mac (or Linux) computer, so you already know how to do it.
If not, you can check out this detailed guide on backing up your Chromebook to an external storage device.
Enable Developer Mode
Now you’re ready to get rolling.
The first thing we’ll do is enable Developer Mode on your Chromebook so we can install Linux via Crouton. (You’ve backed up your Chromebook, right?)
We need to enable Dev Mode so we can get some more privileges to install third-party software. Turning on Dev Mode lets you do all sorts of things you couldn’t do before.
You can do stuff like play RuneScape, Minecraft, WoW, and even install Steam and Kodi. It’s disabled by default for security. But once you enable it, you enter a whole new world (of games).
So, let’s get started already.
Here’s how to enable Developer Mode:
Step 1: Press “ESC + Refresh + Power Button” together at the same time.
(The “ESC” key is at the far-left corner at the top. The “Refresh” key is where “F3” is on a traditional keyboard. The “Power Button” is at the far-right corner at the top.)
Your Chromebook will boot into Recovery Mode and restart itself. Note that on some older Chromebooks you may have to actually flip a physical switch on the side of the laptop in order to enable Dev Mode (such as the original ASUS Chromebook Flip).
But for most models, it should work just by pressing the keyboard combination.
Step 2: Press “CTRL + D” at the warning screen.
After it’s done booting up, you’ll see a warning screen that tells you that “Chrome OS is missing or damaged.” It’s not. This is just a generic warning message that can be safely ignored.
Go ahead press “CTRL + D” when asked to insert recovery media at this screen. The keyboard combination is hidden from view to prevent the clueless user from messing around.
As soon as you hit “CTRL + D” you’ll see another warning. Go to the next step.
Step 3: Press “Enter” to turn off OS Verification off.
You’ll want to keep OS Verification off. If it turns back on, you’ll essentially disable Dev Mode and you won’t be able to install Linux or run any commands in the command prompt.
Once you turn OS Verification off, you’re officially in Developer Mode!
Can’t get it working? Is your Chromebook automatically switching out of Developer Mode?
If you get stuck or can’t get this working, you can check out this tutorial on how to enable Developer Mode.
Note: Every time you boot up your Chromebook, you’ll likely see this warning screen. It’s important that you follow and press the right keyboard combinations to keep it in Dev Mode. If you press the wrong keys, Chrome OS will automatically revert out of Dev Mode and you’ll have to start all over from the beginning and enable it again.
It’ll also revert back to normal mode if you wait too long at the warning screen. It runs on a timer and if you don’t press anything in time, it’ll switch out of Developer Mode automatically.
If one day you start using your Chromebook and you can’t get Linux running or commands aren’t working from the command terminal, it’s likely that you’re no longer in Developer Mode and you’ll have to enable it again.
Now we can move onto getting Crouton to install Linux.
Downloading Crouton
This step is straightforward.
You’ll need Crouton in order to get Linux on your Chromebook.
You can download Crouton here.
Note: Be sure that it downloaded into the default “Downloads” folder on your Chromebook. If you download it to another folder, the commands won’t work in the later steps. Be sure it’s saved in the proper folder unless you know what you’re doing and willing to modify commands.
You should also quickly skim over the FAQ page here.
And if you ever get stuck, see this page for troubleshooting Crouton.
That’s it. Once you have it downloaded to your disk, we can start installing Linux!
Installing Linux
Installing Linux is a lot easier than it sounds with the wonders of Crouton.
Linux comes in a variety of different flavors. There are literally dozens of different versions (called “distros”) that Linux offers.
Some distros are lightweight and come with the basic tools necessary. Other distros are fully-loaded and come with everything you may ever want so you can do everything you ever wanted with Linux.
You can also get different desktop environments that change everything from the looks, special effects, and UI of it.
If you want to customize your installation, I wrote a detailed guide on how to install different Linux distros on your Chromebook you may want to check out.
To keep things simple, we’ll be installing a basic copy of Linux Ubuntu with the Xfce desktop environment.
This is where the commands come in. Type the commands exactly as shown, without the quotations. And casing matters.
If you get an error, double-check your commands.
Step 1: Launch a shell by pressing “CTRL + ALT + T.”
Step 2: Type “shell” and hit Enter.
Step 3: Type in “sudo sh ~/Downloads/crouton -t xfce” and hit Enter.
Step 4: Wait patiently for Linux to install.
Step 5: Answer the on-screen prompts. When it asks you to create a username/password, be sure that you write down your password. If you forget it later, you’ll have to start all over!
Note: As you input a password, you won’t see the cursor move and you won’t see any characters show up in the field. This is completely normal.
Step 6: After Linux has finished installing, you can launch Linux by typing “sudo startxfce4” and hitting Enter!
This will install Ubuntu, which is what’ll allow us to get Steam or PlayOnLinux. You can also get the game through Lutris.
This is still my preferred method as it has the highest success rate of working. Path of Exile through Linux is straightforward. If you have Linux beta, try using that first and seeing how it runs. Lower FPS can be fixed by getting Ubuntu, Steam, and PoE the old-school way.
If you prefer a video, here’s a video demonstration of the process (not recorded by me):
Getting an error?
If you’re an error like “ERROR: unknown command: shell” it means you’re not in Developer Mode.
Your Chromebook most likely reverted back out of it and you’ll need to enable it again. You can’t use “shell” commands if you’re not in Dev Mode.
That’s it. Linux should only take a few minutes to install depending on your Chromebook’s specs and your connection speed.
Again, be sure that you jot down your password. If you forget it, there’s no easy way to recover it and you’ll have to start over from the beginning.
Switching between Chrome OS and Linux
Linux will then boot up and you’ll be inside the desktop environment.
At this point, you’ll have both Linux and Chrome OS running at the same time.
You can instantly switch between them using the following keyboard commands:
- Press “CTRL + ALT + SHIFT + Back Arrow” to switch to Chrome OS.
- Press “CTRL + ALT + SHIFT + Forward Arrow” to switch to Ubuntu.
Note that the Back/Forward Arrows are on the top-row of your Chromebook’s keyboard- not the arrow keypad!
Now that you’ve gotten Linux installed, go ahead and play around it. Familiarize yourself with all the menus, icons, etc.
Next, we’ll install Lutris.
Installing Lutris
Lutris is a game manager library similar to Steam that hosts dozens of popular games.
It makes them very easy to install, launch, and play on Ubuntu. You can play not only Path of Exile, but games like World of Warcraft, Minecraft, RuneScape, and more! All of this can easily be done on Lutris.
And it’s completely free to use as well!
It’s very similar to Steam and offers downloads for the most popular AAA titles. It includes both free and paid games. Paid games require your login details when you connect to that game’s server. It’s not shareware nor illegal to use Lutris.
You’re not pirating anything, so don’t be worried about copyright. If you need to pay for the game to play it, you’ll have to pay for it.
Their goal is to “Our goal is to support every game which runs on Linux, from native to Windows games (via Wine) to emulators and browser games.” This is taken from their official site.
To install Lutris, all you need to do is punch in some commands.
Launch the command prompt (“CTRL + ALT + T”) and type in the following commands. Remember, don’t type in the quotes and use proper casing!
First, we’ll set up the Lutris repositories:
“ver=$(lsb_release -sr); if [ $ver != “17.10” -a $ver != “17.04” -a $ver != “16.04” ]; then ver=16.04; fiecho “deb http://download.opensuse.org/repositories/home:/strycore/xUbuntu_$ver/ ./” | sudo tee /etc/apt/sources.list.d/lutris.list”
“wget -q http://download.opensuse.org/repositories/home:/strycore/xUbuntu_$ver/Release.key -O- | sudo apt-key add -“
Next, we’ll update Linux and then Lutris:
“sudo apt-get update”
“sudo apt-get install lutris”
That’s it! You’ve now installed Lutris.
If you’re having issues or you’re running a different Linux distro, you can see Lutris’ download page for detailed instructions.
You’re almost done. All that’s left is to actually install Path of Exile onto Linux via Lutris and you’re good to go!
Installing Path of Exile

PoE is easy to install with Lutris (which is why we downloaded it in the first place).
To get PoE, just launch Lutris and search for “path of exile” or “poe” (if you’re feeling risky). Find the game. Add it to your Lutris game library. Install it.
If you can’t find it, you can add it to your library directly from Lutris’ site. Get Path of Exile here.
After it’s done installing to your game library, just launch the game as you would on Steam.
That’s it. Path of Exile will launch and you’ll be prompted to log in to their servers.
You’ve done it! You’ve successfully installed Path of Exile on a Chromebook!
Improving FPS and performance of Path of Exile
When you first log in, you’ll probably want to adjust the graphics settings so the game runs smoother and you get a better FPS.
If you read the hardware requirements for PoE and how most Chromebooks won’t be able to handle it, you’ll know that without some adjustments, you won’t’ be able to make the game playable.
Here are some tips to improve performance and get better FPS on Path of Exile:
- Turn off trade and global chat
- Turn shadows off
- Turn post-processing off
- Turn off screen shake
- Turn texture filter to the lowest setting (until it looks full potato)
- Turn VSync off
- Turn antialiasing off
- Turn textures to the lowest setting
- Turn the resolution to lowest possible setting that you’ll tolerate
- Play the game in windowed mode with a custom resolution
This will get you a significant increase in FPS and performance. I’m playing Path of Exile on my tiny Acer CB3-131 Chromebook.
On default settings, I was getting only about 12 FPS on average. After fine-tuning the game’s graphics settings, I was able to get about 22 FPS just from changing the settings to the above.
Also, if you don’t see any of these options in your graphics settings menu, you may have to uncheck “Dynamic Resolution” in Graphics Options.
A recent update changed how the options are displayed, so just play around with it until you get it right. Fine tune it to perfection!
Troubleshooting

If you can’t get the game running, here are some alternative methods you can try.
Use WINE
This is probably the most straightforward path to playing the game you can get.
You can download WINE, install it, and use it “emulate” the game from a Windows environment on Linux. The only issue is that it uses a lot of system resources and may cause performance issues.
Download WINE here.
You can read up on setting up WINE here.
WINE will be the easiest alternative way to get the game running.
Use PlayOnLinux
PlayOnLinux (POL) is another library similar to Lutris and Steam.
The game has been reported to work and has been approved by the PlayOnLinux team. You can get it by doing the following steps after you have Ubuntu installed.
Download PlayOnLinux by entering these commands:
“wget -q “http://deb.playonlinux.com/public.gpg” -O- | sudo apt-key add -“
“sudo wget http://deb.playonlinux.com/playonlinux_trusty.list -O etc/apt/sources.list.d/playonlinux.list”
Update Ubuntu:
“sudo apt-get update”
Install PlayOnLinux:
“sudo apt-get install playonlinux”
If you need help, here’s their official download page.
After you have PoL on your Chromebook, you can get PoE here.
Use Steam
Path of Exile is compatible with Steam, so if you have Steam running, you can install PoE directly onto it and run it using the Linux version.
First, you’ll need to get Steam. I wrote an entire tutorial on getting Steam on your Chromebook you can refer to.
After you set it all up, the only issue is disk space. Path of Exile is a huge game and most Chromebooks only have 16GB of available space, which isn’t enough. You can either Steam save the game to an external hard drive or other external storage to get around this.
When you add a game to Steam, it prompts you where you want to install it. Just choose the external drive.
You can refer this guide if you need help on changing the game installation directory for Steam.
Again, with the game installed on an external drive, it may cause performance problems. A USB 3.0 drive is ideal.
If you don’t know how to connect an external drive to Linux (or if Linux doesn’t recognize it), you may want to check out this guide on connecting an external CD/DVD player.
Yeah, it’s written for an optical drive, but it works the same for all peripherals on Linux- whether they’re an external hard drive or optical drive.
You may want to check out this buyer’s guide I compiled if you want an external hard drive that works with Chrome OS and Linux. It lists the best compatible drives that work with Chromebooks so you can use it for both systems and make the most of it.
And finally, you may want to see this guide on connecting an external storage device to Chrome OS.
Did you get PoE working?

Congrats. You’re now playing Path of Exile on your Chromebook!
With Lutris, you can play a lot more than PoE. There are a ton of games supported by Lutris and you can install them all!
If you have any questions, just leave a comment and I’ll try to get back to you ASAP.
Or if this guide has helped you, let me know as well! Consider telling a friend about it and dungeon crawling and taking on Shaper or Uber Atziri together =]!
Thanks for reading!
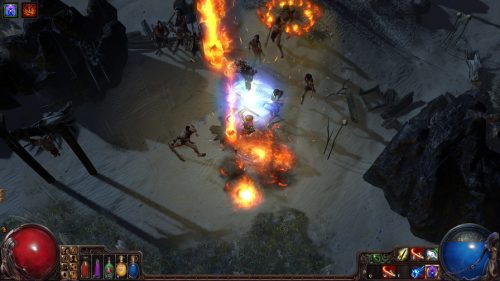
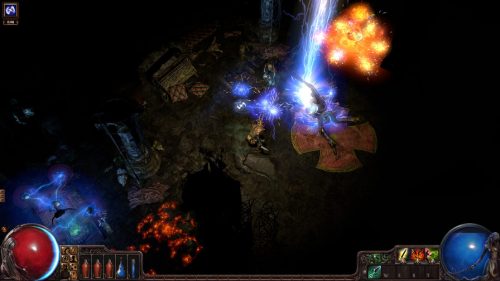
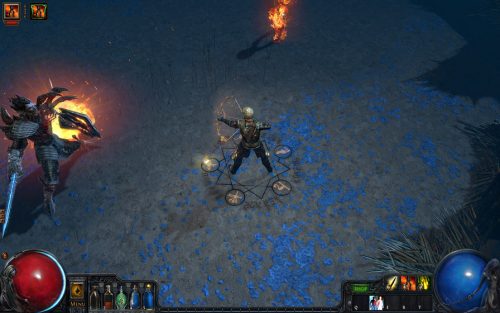
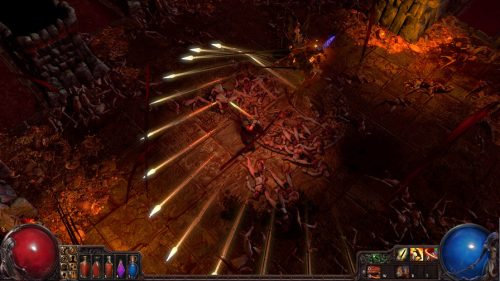
*All images via Path of Exile.
")
")
")
")
This doesn’t work for me, once I get lutris installed, it won’t search for path of exile. I get a “the specified location is not supported” error. Also, this version of linux is super buggy, I can’t even use the web browser to install chrome so that I can copy and paste commands correctly (when copying in the native web browser, it usually cuts off a few letters) It really just seems like lutris isn’t set up right to me, great tutorial though, going to try play on linux now (in the copy of linux that I installed from this tutorial) Thanks again 🙂
Hey there,
Sorry about the issues you’re having. Xfce with Ubuntu is usually my go-to stack on a Chromebook because it’s fast and minimalistic. You may be getting some bugs here and there because the version could possibly be outdated. Regardless, you can always try something with a little more punch like KDE or something if Xfce doesn’t work out for you.
If you get it working with PoL over Lutris, that’s taking initiative =]! I’m going to go over this guide again when I have some time to make sure it’s not outdated. Thanks for bringing this up!
Let me know if you have any other questions. And thanks for the kind words.
I am getting linux installed easily enough and i think lutris is working fine. the problem lies in downloading the actual game. The download go until a point that it gives me the error “Installation Failed! Specified executable not found. Help!
Hey WillyT,
It seems that this is a common error message a lot of Lutris users are getting right now based on posts from their forum.
The error: “Installation Failed! Specified executable not found.” seems to have to do with a recent Linux or Lutris update. Let me check it out and see if I can find a solution. Sit tight.
Thanks.
Thank you for replying! I’m very new to linux so I may be screwing up somewhere but at some point I did manage to supposedly get the game properly installed after installing Wine (maybe incorrectly) and winetricks (I think i did this right). The problem then is that it wouldn’t launch from lutris. It says game being played whenever I attempt to open it but a window never appears. Again thank you for sticking with this. Im super excited at the prospect of playing from my chromebook and hope to not have to buy a PC. You are doing awesome work.
Hey again WillyT,
No problem =]. You deserve some praise for taking the initiative and getting it installed! You’ll get the hang of it after a while- and you’ll probably end up liking it and never have to worry about buying expensive software or major security bugs forever.
It does seem like an update broke something at this point. If this is the case, Lutris should release an update soon to patch it. But I’ll keep my eyes on this to see if any new developments take place.
Have you tried installing other games from Lutris and seeing if they run? Or is it specific to a single game? If WINE and winetricks are installed and running, the problem likely lies with Lutris. You could try updating all your repositories to see if it makes a difference. It’s very easy to do:
Launch the command prompt (“CTRL + ALT + T).
Run the following command:
sudo apt-get update && sudo apt-get dist-upgrade
Then reboot and try again.
If it doesn’t work, we’ll have to keep hanging on and see what Lutris has to say about it. Let me know if you find anything out!
And thanks for the kind words =].
Well League of Legends failed as well. I may have to start fresh with all my downloads of WINE and winetricks. While i think my winetricks install went well for some reason i think the WINE install is where i failed. But may just be Lutris as you suggest. Hope this all gets resolved and I’ll keep checking up here. At this point I’ve spent enough time over the past few days trying to figure this out that I absolutely must succeed.
So looks like either the problem is Lutris or I have downloaded WINE incorrectly, which I have been suspecting anyways. I tried League of Legends as well and that failed too. I will try to find a newer guide on installing WINE while I wait for updates on this Lutris situation. This may seem like a super stupid question but once I install Linux am I supposed to immediately switch the the command terminal on the Linux system or Install WINE and Lutris on the Chrome OS console? I have been doing it in the Linux one but I figured I would risk looking stupid in order to know that my problem wasn’t that. Thanks again!
Hey WillyT,
Sorry about the delay. Been swamped with work lately!
No worries about the questions- we all have to start somewhere =]. After you get Linux up and running, you install WINE/Lutris using the command prompt within your specific Linux installation (I think). It’s been a while since I messed around with Chrome and Linux and things may have changed. I’ll have to set up a copy this weekend or something.
Also, I thought of something the other day- are you by chance using Xfce? Or KDE? Or something else entirely? This may or may not have anything to do with the error you’re getting. Forum posts have been unsuccessful lately, so I’m guessing it’s likely a Lutris problem.
If you happen to find out a way (or any new discoveries for that matter), I’d be glad to read them (plus other readers who may be having the same issue)!
Thanks again.
So I have been trying a hell of a lot of things to get it to work. I started with your guide using xfce and I ran into trouble somewhere along the way. I also have tried in Unity and KDE but the most success I have had was in xfce and installing WINE and winetricks. Without winetricks I hadnt been able to fully install the game. With winetricks i get the game installed but after updating and pressing launch my computer shuts off and restarts. When it comes to installing WINE, the problem looks to be occuring in the repository step. Whenever I try to add repositories it says command not found. I think I need to properly install WINE before I can say if anything else is the issue. If you happen to have a link to an updated WINE installation guide i’d love to have it! Also, I may have to try installing a more recent version of Ubuntu as I have tried exclusively 16.04 so far.