
So, your Chromebook’s camera quality is grainy, blurry, dark, noisy, or just plain bad.
And you want to improve the camera quality.
I mean, you’re not gonna upload THAT to share with the world- are you?
Thankfully, there are some quick and easy fixes you can do at home (without buying anything) to enhance the pictures and videos you take.
In this guide, we’ll talk about:
- How to use the Camera app
- How to get the best picture quality possible
- Ways to enhance photos and videos
- How to use an external USB webcam
- Lighting, distance, and other tips for taking good photos
- Adjusting the webcam resolution, setting timers, and settings
- Using apps to add filters, edit, adjust brightness/contrast and touch up photos
- Fine-tuning the Chromebook webcam using the command line
- Some of the best free apps for editing photos
- A list of the best Chromebooks webcams on the market
- And more
By the end of this page, you should have more knowledge about getting the best picture quality out of your Chromebook than you’ll ever need to know.
Or at least, that’s my goal.
Sound good? Let’s enhance your picture quality!
How do I use the camera on my Chromebook?
Using the Camera app is easy.
All Chromebooks come with the app pre-installed, and it can’t be uninstalled under normal circumstances.
So it’ll never just disappear or become “accidentally” uninstalled by the user.
Something to note: The webcam on your device is accessed through an app called “Camera.”
This may be confusing for those looking for a “webcam” or something similar. It’s probably named as such because people are used to the “Camera” app on their phone.
Regardless, here’s how you use your Chromebook’s webcam.
- Click on the Launcher at the bottom-left of the screen.
- Search for “camera.”
- Click on the app to launch it.
That’s it.
You’ll see a new smaller window popup with picture preview. You can take photos, record videos, adjust gridlines, crop, edit, print, and upload to Drive from this app.
Your face will likely show up in the preview because the webcam turns on automatically. If you have a Chromebook with two cameras, you can toggle between them using the rotate camera button.
Or if you have an external camera plugged in, you can access it from this app also.
How to use and adjust Chromebook camera settings

Your Chromebook has a ton of built-in settings that you can use to automatically enhance your picture quality.
No need to download apps or any fancy photo enhancing tools. You have all the basics covered here.
First, launch the Camera app.
When the Camera app is running, click on the gear icon at the top-left of the window. This is where you can adjust all the webcam settings.
Here’s a quick summary of the different functions offered on Chrome OS.
Mirror the image
You can flip the picture horizontally when taking a photo. I rarely use this and have a hard time imagining why you would, but I guess it’s some hip feature that I never learned to use.
Regardless, if you need to make your photos look like they’re being mirrored, click on the first icon (mirror image) from the left-hand menu to use this feature.
Turn the gridlines on or off
Gridlines help you take a precise photo.
Even with terrible picture quality, you can still at least have a photo that aligns perfectly to the center of the screen. I can see this being useful if you need to position yourself directly in front of the webcam for a online meeting or video conference.
Or perhaps you’re trying to follow the rule of thirds. Regardless, click on the gridlines icon to toggle them on or off (second icon)
Set a timer
You can set a timer so you can snap the perfect picture. Click on “Timer duration” to see the various timer settings for your Chromebook to automatically take a photo.
Spoiler alert: There are only two settings: 3 seconds and 10 seconds. Click on either one to set up a photo timer the next time you take a photo with your webcam.
This is the third option on the left-hand menu and has the stopwatch icon.
Rotate camera
This one is obvious. Click on the rotate button to flip between your front and rear camera.s If you only have a single webcam, this button does nothing.
Alternatively, if you bought a USB webcam and plugged it in (and it’s compatible with your Chromebook), you can use this option to switch to the external camera and use it.
Use volume buttons to take pictures
If you have a two in one Chromebook, you can use the volume buttons on the side to take pictures. This makes it easier to snap a photo in tablet mode.
Enable this for easy photos just like using a big smartphone.
How to switch between photo or video
On the right-hand menu, you’ll see different functions that change the camera mode.
The top two options are “video” and “photo” which let you toggle between taking photos or recording videos with your Chromebook. Note that these will use the resolution settings you’ve set in the options menu.
Take square photos
You can take a square photo by using the “square” option. Self-explanatory. This can only be used for pictures as Chromebooks don’t support square videos.
View your photos
Every picture and video you take will automatically show up in a small preview in the bottom-right corner. You can click on it to view it, delete it, or upload it to Google Drive.
By default, the photos are saved in the “Downloads” folder which can be accessed by the “Files” app.
(New to Chromebooks? Learn all the basics.)
Enhance photos
The pictures you’ve taken can be enhanced using your Chromebook’s built-in tools. There are some VERY basic tools that you can use to quickly enhance them.
By default, the native image editor on Chrome OS allows you to:
- Crop photos
- Edit photos (adjust levels, brightness, contrast, etc.)
- Rotate photos (Rotate it horizontally or vertically at 90-degree intervals)
- Print photos
Lastly, you can print your pictures by clicking the print icon after you open them up in the image viewer. Again, you can find them in the Downloads folder.
Click on the Print button to print them to a connected printer. Google Cloud are fully compatible with Chromebooks and let you print anything from anywhere.
Consider using one for an easy setup with Chromebooks.
How to change camera resolution on Chromebook
Adjusting the Chromebook camera resolution is easy. Chrome OS allows you to change it by toggling the built-in options menu- even if you have two cameras on your laptop.
Here’s how to change the resolution:
- Click on the Launcher icon at the bottom-left of the screen.
- Search for “camera” and launch the app.
- After the webcam app is running, you’ll see your webcam turn on and your face will appear on the screen. Locate the options menu at the top-left of the Camera app (gear icon).
- You’ll see a list of all the cameras on your Chromebook. If you have one camera, you’ll see all possible resolutions for that webcam.
Chrome OS allows the adjustment of both photo and video resolutions.
For example, if you have just one front camera, you’ll see one entry for changing the resolution of photos and another for videos.
The same goes for rear cameras:
- Find the camera you want to adjust.
- Decide if you want to change the photo or video resolution.
- Click and adjust.
How to change webcam settings using Crouton
You can use a combination of the command line and Crouton to adjust your webcam settings on the system level.
Note that if you’re not comfortable adjusting system settings or using the terminal, you may struggle a bit with this approach.
However, I’ve written out the steps in detail with all the code you need to do it. And if you ever brick your Chromebook, you can always factory reset it to restore it=].
Chrome OS is very versatile and self heals automatically.
Here’s how.
First, you’ll want to create a copy of the important data. This will wipe any saved files on your Chromebook (such as those in your Downloads folder).
You can back up your data to Google Drive, an SD card, USB drive, or an backup drive. Anything works. Just make sure it’s compatible with Chrome OS and you’re good to go.
(You may have to format your drive before use.)
Next, enable Developer Mode. I’ve written a complete tutorial that outlines how to use it. Once you do this, your system will be wiped.
So be sure you’ve already made a backup before proceeding!
Download Crouton and install it. This is as easy as grabbing the file online, launching the terminal, and typing in a single command.
So at this point, you should have a fresh install of Chrome OS (with Developer Mode enabled). And you should have Crouton installed.
Now, you’ll be able to adjust system-level settings for the webcam.
Here’s where it gets fun. Note that all commands are enclosed in quotation marks (“) in this tutorial.
When you type them out, do NOT use quotes!
- Launch Chrome.
- Press “CTRL + ALT + T” to launch the command prompt.
- Type “shell” and hit Enter.
- Type “sudo enter-chroot” and hit Enter.
- Update Linux by typing “sudo apt update”
Next, we’ll get the developer tool that allows us to change the webcam settings. It’s called v4l utilities.
Type “sudo apt install v4l-utils”
The packages will be installed on your machine.
After it’s done, locate the webcam on your system. It’s usually labeled as “video0” since it’s the default camera input on your device.
List the attached cameras first:
Type “v4l2-ctl –list-devices”
You’ll see a list of camera inputs. You likely only have one, which is “video0.”
Next, we’ll want to adjust the settings (AKA “controls”) of the webcam.
Do this by bringing up the list of controls:
Type “v4l2-ctl -d /dev/video0 –list-ctrls”
This will populate a section on your screen that lists a bunch of different webcam controls you can adjust.
You can change anything from:
- Brightness
- Saturation
- Contrast
- Hue
- Backlight compensation
- Auto exposure
- Absolute exposure
- Gamma
- White balance
- Power frequency
- Sharpness
Changing each value is as easy as using the integers provided in the list of controls.
For example, if you want to change the contract of your Chromebook’s webcam, you’d type:
“v4l2-ctl -d /dev/video0 –set-ctrl=contrast=30”
Or changing the brightness permanently:
* v4l2-ctl -d /dev/video0 –set-ctrl=brightness=40”
Or adjusting the saturation:
* v4l2-ctl -d /dev/video0 –set-ctrl=saturation=60”
You get the process.
This will permanently alter your webcam’s control settings and allows you to have a lot more power over how your webcam works.
If you ever want to revert it, you can reset the values back to the “default” values listed under each control.
Alternatively, you can simply revert your Chromebook to factory settings. And it’ll be like nothing ever happened =].
How to zoom a Chromebook camera
Trying to figure out how to make your webcam zoom in or out?
Sadly, this isn’t possible on Chrome OS. Chromebook cameras are “as is” and can’t zoom in or out.
Thus, you have two options:
- Sit closer or farther away from the webcam
- Buy an external webcam that has zoom or autofocus options
Many people who use Chromebooks are of the younger crowd. They’re used to easily pinching the screen on their phone to zoom in or out on their camera.
So they expect Chromebooks to work the same way.
However, pinching the screen and trying to digitally zoom the webcam will do nothing.
Chrome OS currently doesn’t support this feature and you’ll have to use one of the above workarounds. Sorry.
How to uninstall the Camera app
The “camera” app comes pre-installed on Chrome OS and can’t be uninstalled.
If you’re afraid of being recorded or have other privacy concerns, consider blocking the camera with a piece of tape. There are products made especially for this purpose:
Common problems with Chromebook cameras
Here we address some common issues and how to fix them easily.
There really aren’t any problems with it. It works- even though it may not be the best quality.
The camera picture is grainy and not sharp
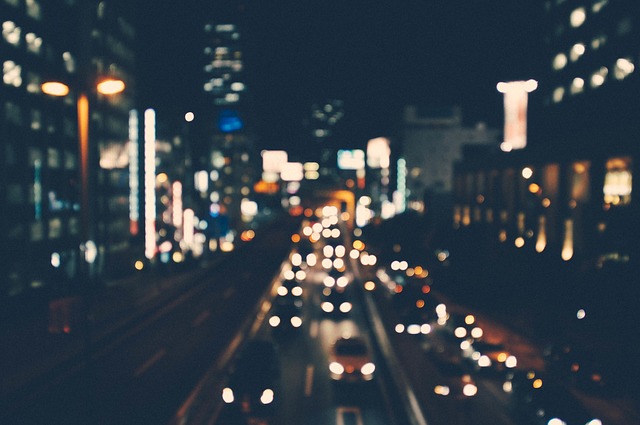
This is one of the most common complaints with the built-in camera on Chromebooks.
Since these laptops are built to be affordable, the camera they offer is usually sub-par in quality.
Even though they’re advertised to be “HD” at 720P (most common) or 1080P, the camera post-processing, lens, and other hardware all contribute to the overall picture quality. That’s just something owners need to deal with.
If you buy a $200 Chromebook, you shouldn’t expect the webcam to be the best.
Some of the most common complaints about the camera are:
- Grainy picture quality
- Blurry photos or video
- Dark pictures
- Noisy pictures or video
- Camera slowness
These are all typical of the standard camera and there’s not much you can do to resolve it.
With the exception of camera lag, that’s completely based on your hardware specs and you can’t do much to change it.
There are ways to make your device run faster, but even then, you can’t really “fix” a camera that’s a few frames slow.
However, you can try these tips to optimize the picture quality:
- Take photos in a bright area
- Use well-lit, even lighting
- Don’t point the camera directly at the light source
- Use warm lighting, rather than cool, blue lights
- Stay still when you snap the picture
- Be level with the camera, rather than pointing it “upwards” at you and looking down at the Chromebook
- Use photo-enhancement apps
- Edit your photos in post-processing
- Use an external webcam
- Buy a Chromebook with a high-quality webcam
- Use an LED panel (via Amazon.com) to brighten up the room
- Try a selfie LED ring (via Amazon.com)
The most significant way to quickly improve the picture quality is to use the right lighting.
Choose a warm, bright light that’s evenly distributed throughout the room.
Don’t point the camera directly at the light. Try to position the Chromebook so that it’s level with your face or object you want to take a picture of.
After you snap the picture, you can do some touch-up work with apps or online editors, which can be found for free.
If you need good picture or video quality and don’t have time to always get in position for the “perfect” shot, consider buying an external USB webcam for your Chromebook.
Or just buy a Chromebook that has a good camera.
Chromebook camera is not available error
This is a message that shows up on a black screen. It’s a known bug that occurs when the Chromebook is waken up from sleep/hibernate mode.
There are multiple ways to fix this:
Update to the latest version of Chrome
This is the most obvious solution.
Make sure you’re running the latest version of Chrome OS. Update it by going to Help > About Google Chrome > Update. This camera bug seems to plague users around Chrome OS 78 or so. Update your system to resolve it.
The later versions of Chrome OS have no reports.
Use a Guest account
You can try signing in as a Guest and testing the webcam. If it works, then you can eliminate hardware failure as the probelm. It’s likely a problem with a sync between accounts.
However, if it still fails to work, there may be a hardware issue. Contact your manufacturer if the following steps doesn’t restore the camera.
Delete and re-add the main, primary owner account
Try this if the previous step worked. Back up your data, delete the primary (owner) account. And then re-add it again. Test if the camera works or if you still get the “camera is unavailable” message.
Do a hard reset
The final step is to factory reset your device.
You can do a Powerwash to restore it back to factory settings. If it still throws the error, then you can be 99% certain that it’s a hardware problem. Take it back to the retailer for an exchange, or contact the manufacturer under warranty.
How to use an external webcam on a Chromebook
Chrome OS can switch to an external webcam you have plugged into your Chromebook.
This way, you’re not stuck with the crappy camera quality.
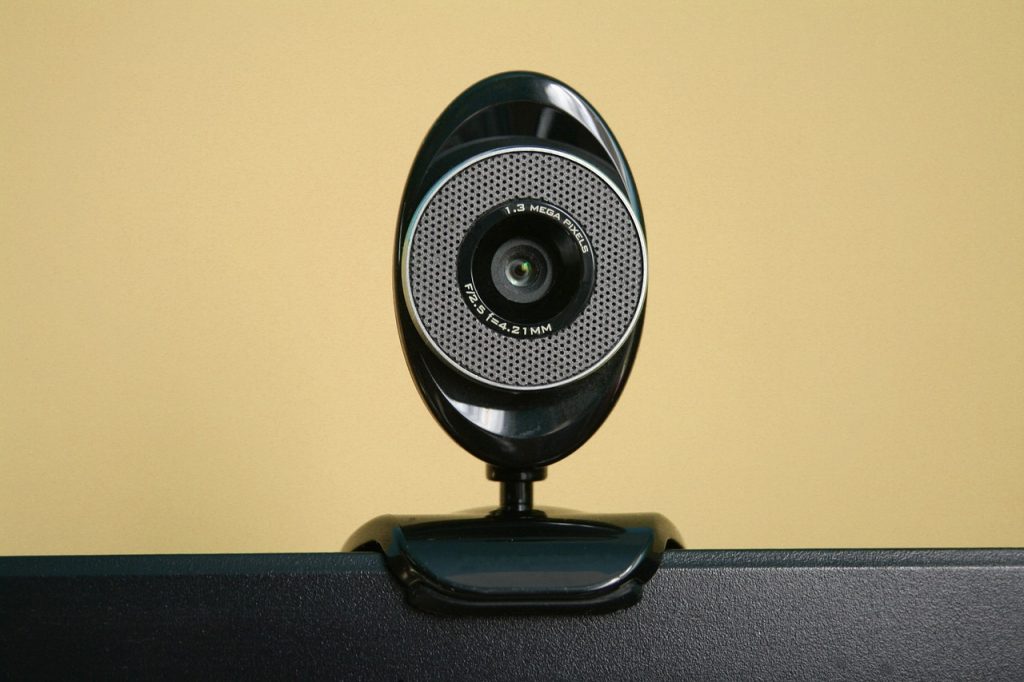
Use a USB webcam
For those that use their Chromebooks for demanding scenarios where webcam quality matters, an external USB camera is your solution.
For example, if you:
- Stream on Twitch using your Chromebook as a secondary camera
- Need good quality for business meetings or presentations
- Use your Chromebooks for sales pitches
- Need to present a project to your colleagues, peers, or teacher
- Or perhaps you’re a teacher using a loaner Chromebook and you’re working from home
To accomplish this, all you’ll need is a quality camera compatible with Chromebooks.
You can sift through that list (made by yours truly) to save you time. Read some reviews. Compare some specs.
Once you buy one, you’re ready to add a new camera to your device.
Here’s how to connect an external webcam to your Chromebook.
- Plug your webcam directly into your Chromebook’s USB port.
- Press the Launcher key (search glass on your keyboard or the icon at the bottom-left of the screen)
- Search for “camera” in the search box.
- Launch the Camera app.
- You’ll see the app pop up and your Chromebook will automatically turn on the built-in native webcam (you’ll probably see your face at this point).
- Click on the “Switch camera” icon to switch to your external webcam.
Your Chromebook will now feed the camera from your USB camera instead of the built-in one.
If your Chromebook has two webcams, you can switch between both the front and rear-facing cameras AND the USB camera. Just hit the toggle camera icon again.
This is common in convertible models since there are a few Chromebook units that have two cameras.
Use a digital SLR camera
If regular USB webcams do not cut it for you, then you may want to consider using a professional camera (like an actual camera) and connect it to your Chromebook.
Note: This is NOT a proven method. I just remember reading that it’s been done before. But take that with a grain of salt.
You can use SLR digital cameras through a capture device and HDMI.
Some newer cameras are completely mirrorless which means they use full digital processing. For video quality, they’re excellent.
And the best part about using a completely digital camera as your primary webcam is that it doesn’t have any moving parts.
Therefore, you can mount it and use it all day just like a regular webcam. The quality is superior to any laptop’s webcam and beats the majority of high-end USB webcams also. Even a moderate, budget-entry level DSLR camera will top the best plug-in USB cameras.
The drawback? Price. They’re relatively more expensive compared to their USB counterparts (if you can even say that since they’re not in the same class).
You’ll also need to set up a complex capture process to link it up to your Chromebook- well, it’s not that complicated. But it’s not as simple as plugging in a USB.
You don’t HAVE to use a mirrorless camera, but it’s recommended for video because mirrored cameras will become damaged over time since the sensor is exposed the entire time.
Mirrorless cameras use an internal monitor for processing the viewfinder image. You don’t want to buy an expensive mirrored camera and destroy it by streaming video.
You’ll need a capture device to pair with the SLR camera, and an HDMI cable to connect all of it together.
Here’s a video tutorial on setting it up:
Do Chromebooks have good cameras?
Chromebooks don’t generally have superior cameras compared to other laptops, but then again, they’re cheaper and more affordable. You get what you pay for.
If you buy a Chromebook, don’t expect the best picture quality for taking selfies or video calling. The cameras are usually blurry or grainy with a lot of noise across the screen.
Even the devices that are marketed as “HD webcam” or “HDR webcam” still have quality issues.
So don’t believe the hype. It’s all in the camera processing and quality of hardware, both of which Chromebooks generally lack.
However, there are solutions to this.
As mentioned earlier, you can enhance your picture quality simply by adjusting the webcam settings, choosing a suitable environment, and having good lighting.
Alternatively, you can buy a Chromebook with a good webcam or consider an external USB camera.
Should you block your Chromebook’s camera?
Privacy is a big thing. Although Chromebooks are secure by design, there’s always the inkling that the camera may become hijacked or recorded without your knowledge.
This whole advent sparked the rise of camera blockers, which go directly over the lens on your laptop to stop the possibility of someone spying on you.
If you’re paranoid about this, consider buying a camera blocker:
- CloudValley sliding webcam cover (Amazon.com)
- Cimkiz alloy privacy covers (Amazon.com)
- Eyesoft magnetic covers (Amazon.com)
Even Zuckerberg of Facebook has been seen with his laptop’s webcam covered up!
They’re cheap and 100% relieve you of worry.
Best Chromebook camera apps

There are many different apps you can download and use to quickly modify your Chromebook’s camera.
Everything from adding filters, tones (sepia, natural, etc.), changing brightness/contrast, auto level, black and white, effects, and more can be done through an app.
Newer models can download Play Store apps to do this. Here are some camera apps that work with Chromebooks worth checking out.
Snapseed
Snapseed is a photo editor developed by Google that lets you easily make adjustments to your photos on your Chromebook.
There are a total of 29 tools and filters that can add the finishing touches to pictures taken directly from your webcam.
Snapseed comes with the majority of popular tools you’d expect:
- Brush
- HDR
- Perspective
- Details
- Tune image
- White balance
- Heal
- Curves
- Expand image
- Lens blur
- Glamour glow
- Vignette
There are also basic photo manipulation features like crop, rotate, and even RAW DNG file editing.
Some of the filters are drama, grunge, grainy, vintage, noir, retro lux, black and white, and more.
You can also add frames, text, enhance your face, correct your face pose, and even blend two photos into a single one.
Snapseed is free to use and one of the most popular photo editors. It works on Chrome OS through the online editor so you can manipulate the photos you took with your camera right there on the spot.
Adobe Lightroom
Lightroom is a free photo editor made by Adobe- the creative workforce behind Photoshop.
While many consider Lightroom to be a free lightweight version of photoshop, it’s a very different set of tools. It’s easy enough for a beginner to learn and use quickly without the need for reading tutorials (pages upon pages) like you’d have to do with photoshop.
The editor doesn’t stand up to Photoshop in terms of the depth and complexity of editing you can do, but it works as a quick touchup tool (and it’s free).
Lightroom allows you to use sliders to adjust brightness, contrast, light, color, etc. you can add photo filters, adjust image size, and even change the aspect ratio.
The tool has geometry sliders that let you adjust the perspective of the photo (upright and guided upright tools).
Selective adjustments allow you to remove anything from your pictures with the healing brush. Hue adjustments allow hue and saturation manipulation.
And for those who have no background in this and just want some professional looking pictures, you can use the basic filter presets. I’ve written about Lightroom as an alternative to Photoshop for Chromebooks before. And I still use the app now and then for ‘gram.
Fotor Photo Editor
Fotor is an online photo editor that’s free to use for Chromebooks.
Since it runs directly through Chrome, there’s nothing to download or install.
Add the extension to Chrome and you have an easy way to quickly touch up your pictures.
Fotor is used by over 200M people and currently has over 300K active users at the time of this writing. It allows you to do all the common functions like adding frames, text, filters, stickers, effects, collages, and designing various graphics.
There are preset designs and templates for use including covers for Facebook, Twitter, Instagram, posters, cards, and even youtube.
Since it’s a web-based editor, you can use it across all your devices and pick up where you left off.
Snap the photo with your webcam. Save it to your Downloads folder. Launch Fotor and edit them online.
My only gripe with Fotor is that recently they’ve locked up most of their tools for paying users. You should check it out if you only need basic photo touch-ups.
Otherwise, you can use a free alternative which DOES have those tools by default (Lightroom or Snapseed).
Webcam Toy
Webcam Toy is an app that lets you take selfies with random effects. This app works by accessing your Chromebook’s webcam and then pops up with a grid full of different effects.
You choose your effect and then once you snap a selfie, it automatically applies the effect. There are dozens of effects you can use all for free.
Over 1M active users use this extension, which is quite surprising. You can make anything from comic strips to kaleidoscope effects.
One thing to note is that the photos are pretty tacky and cheap. They’re not the best quality, but again, it’s free and fun to mess around with.
Here’s a hint: Don’t move when you use it. The filters need you to stay still to apply correctly or else you’ll see a blurry result. This app doesn’t work on videos, only pictures.
Polarr
Polarr is a free online photo editor that works perfectly with Chromebooks.
This online editor allows you to create professional-looking photos using its variety of tools. The web app works directly in your browser with no plugins or downloads required (Chrome OS can’t run .exes anyway).
The app gives you spectacular control of hues, details, saturation, effects, filters, weather, clouds, flares, curves, custom overlays, double exposures (merge photos), and more. There is a paid version of the app, but the freemium version should do the trick for most people.
This extension gives you a shortcut to the online editor which can make it easy if you constantly need to add finishing touches to your pictures.
Otherwise, you can go directly to their online app and edit from there. There’s also a right-click menu option that allows you to directly edit a selected photo by adding an “Edit with Polarr” selection to save you time.
Additionally, this extension lets you edit photos offline on your Chromebook by caching the online version.
So if you’re a traveling artist that has long commute times, you can get some editing done on your Chromebook with this extension. Pretty cool.
PhotoMania
PhotoMania is another online editor that lets you create ecards, frames, captions, and more. There are over 500 effects that you can choose from to edit your pics.
The extension just lets you quickly access their page to add touch-ups to your photos.
Similar to Polarr, PhotoMania has a bunch of pre-built tools that let you quickly edit photos. There are a lot of effects you can use and filter to suit your needs. The UI is easy to use and straightforward. If you just need to do some basic photo work, this should do the trick.
PhotoMania is free to use and lets you create ecards to share with friends- straight from your Chromebook.
You don’t need the extension to use the app, but it adds a shortcut to quickly import your webcam photos for editing straight from the Chrome Web Store app.
What Chromebook has the best camera?
There are some Chromebooks out there that have top-notch webcams.
If this is important to you, you may consider buying one of those so you don’t need to deal with camera quality issues and frustrations down the line.
If you’re a business professional, teacher, sales agent, or even just someone who values having excellent picture quality for video calls, then invest in a Chromebook with a good webcam.
Here are a few product roundups for you to check out:
Did you get your camera up to par?

You should now have everything you need to know to enhance the picture quality of your Chromebook’s camera.
We’ve covered adjusting the resolutions, changing the settings, the best camera apps, and how to fix grainy or blurry video.
If you have any questions, post a comment below and I’ll get back to you ASAP.
Or if you have tips or tricks to share with the world, leave them in the comments section!
Did you find any use out of this guide? Consider telling a friend =].
Thanks for reading.
")
")

")
When i screenshot something for my wallpaper, it looks fine until i place it as the wallpaper. Can you help?
It was saying it couldn’t find the command Q n O
Hi my daughter has a chromebook and the camera was working fine until this morning when all of a sudden it shows very blurry. It is difficult to participate in class when it is so blurry. Any ideas to why this might have happened and how to fix it? Thank you
Yes that is exactly my problem too. The product was bought September just a few months old pictures were sharp, crisp, bold colours and now all of a sudden grainy, blurry, how are we supposed to take pictures to turn in assignments, etc. Not pleased.
The external camera is a HD 1080p Logitec. The resolution in the chromebook for pictures is supposed to be 5Mpix. I wonder if the software con not manage it.
Hi Andy, thanks for the advices. I my daughter has an Acer Chromebook, which camera works fine on video conferences, but it takes horrible blurred pictures. I plugged it an external Logitech HD camera and it worked very well, but after a few days the external camera also started taking unfocused and blurred pictures. It is strange because the external camera indeed shows focused and perfect HD video in videoconference, the problem is when making the photo, the result is awful. I hope you have some advice about it.