With all the push to online classes, online meetings, and online everything, being able to quickly snip something to share with your peers is crucial.
Whether you’re saving a paragraph of text or proving to your boss that you weren’t slacking off, a snipping tool is a necessity.
Let’s dive in and see how you can get this overshadowed tool up and running on your Chromebook.
Why don’t Chromebooks have a snipping tool?

They sure do, friend.
I don’t know who told you this, but it was probably a Chromebook hater (or H8TER?).
All Chromebooks are equipped with a clipping tool- yes, even yours. But it is a little hidden and hard to find, so that could be why.
Or you may be using a school or work Chromebook, which could have it disabled by default.
What is the snipping tool? What does it do?
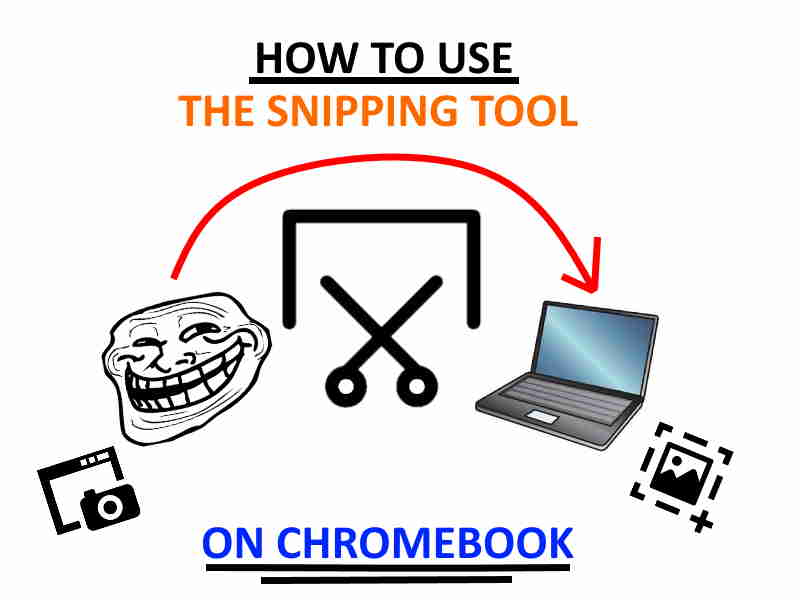
The snipping tool is a handy tool that lets you do a full or partial screenshot anywhere on your Chromebook’s display.
It’s good for taking quick screenshots of only a section of the screen, such as snippets of texts, pictures, or memes.
Don’t forget the memes.
If you’re using a Chromebook for school or work, you’ll find that taking screenshots comes in handy more than you think.
Okay, cool. So how do I use it?
How the snipping tool on Chrome OS works is like this:
First, you activate it by pressing “CTRL + Show Windows” if you’re doing a single page screenshot, or “SHIFT + CTRL + Show Windows” if you’re doing a selective screenshot (partial).
When you activate the tool by using the shortcut or app with the SHIFT key pressed, you click and drag your pointer to choose what you want to screenshot.
This is basically a rectangular outline of dotted lines. The screen also dims and gets a dark gray overlay so you know you’re in picture mode.
You can adjust the cropping area as you wish. Take a whole screen screenshot or a partial one.
Then you can snip it. The part inside the captured outline rectangular object can be saved as an image for uploading or sharing.
Or it can be saved to your clipboard so you can copy/paste it quickly.
Share it on Slack, Google Classroom, Hangouts, Facebook Messenger, WhatsApp, Google Slides, Google Docs, etc.
Snipping comes in handy! With the advent of remote learning, meetings, or work, it’s a time saver.
Is there a snipping tool on Chromebook by default? Or do I need to download something?
Yes, your friends at Google has built a snip tool right into your device.
Chromebooks come with its default snip tool. It’s built-in to your Chromebook so you don’t need to download any extensions, apps, or other third-party software to use it. And it works beautifully.
It has all the basic features that let you crop a partial screenshot of anything on your display.
You can also take full screenshots, save the screencaps, paste them elsewhere, or even record your screen. All without the need to download anything extra.
Plus, it’s free! Thanks, Google.
But if you’re looking for some extra functionality, perhaps a third-party snipping tool extension will do the trick.
We’ll talk about those in a later section.
How do I install the snipping tool?

You don’t need to install the basic snip tool- it’s already built into Chrome OS. Just launch it by pressing the following shortcut keys:
If you want to snip the entire screen, hit “CTRL + Show Windows”
(The Show Windows is where the “F5” key would be on a traditional Windows keyboard- top row, middle.)
If you want to do a partial snip, hit “SHIFT + CTRL + Show Windows”
You’ll then be given a box to click and drag whatever you want to snip.
If you’re wondering:
“Where is the snipping tool on my Chromebook???”
-Every frustrated owner
It’s right under your nose- err, fingers.
While it’s not obvious, you can either search for it using the Launcher menu (hit Launcher then type “snip”) or you use the keyboard shortcut.
If you’re already familiar with some other snipping tools like Evernote’s Web Clipper or Windows Snipping Tool, you can add them to Chrome using the Chrome Web Store.
What about clipping things outside of Chrome?
Or you can use the Google Play store to add one to your Chromebook. Apps downloaded through Chrome will only work in the Chrome browser- so I can’t screenshot things that are outside of it.
Apps downloaded through the Google Play Store should work anywhere on your Chromebook- meaning you can screenshot other apps you’re using, games, videos, pictures, text, memes, Discord, Skype, Slack or Zoom.
How do I snip something on Google Chrome?
For the visual types, this is all you need to know:
When you come across something that you want to snip, just hit the keyboard shortcut to launch the snipping tool.
It’s handy for snipping anything you need to save or share with others.
You can clip everything you come across on the Interwebz:
- Google Slides or PowerPoint presentations
- Important things to note or remember for later
- Random text on websites
- Pictures
- Video screenshots
- Emails
- Research citations/references
- Lectures, deadlines, or dates
- Documents (whole page or partially)
- Sharing something cool with your friends or colleagues
- Pasting memes to your friends in Discord, Zoom or Slack
- Random snippets you come across online that you want to save for later
- Recipes, tutorials, or books
Whatever you need to save, you can do it!
How do I snip in Google Docs?
Just use the built-in tool. There’s no need to get a separate extension for Google Docs. You can screen clip with it no problem.
If the default one isn’t good enough or doesn’t offer the functionality you need, you can download a third-party extension from the Chrome Web Store.
Since Google Docs runs through Chrome, extensions should work. You can then clip whatever text you want directly from a document, spreadsheet, slide, etc.
Google Docs doesn’t let you cut, copy, or paste through the right-click menu (note that this has been fixed in newer versions).
If you use the hotkey commands, CTRL+C or CTRL+V or CTRL+X it works. It’s useless unless you get the add-on, which is kind of annoying.
You can clip a paragraph of text quickly using the snip tool or using a Chrome extension like PicFlip or Screenshot Tool.
Sadly, there are no Add-Ons available in Docs that do any screen clipping that I could find. If you have any to suggest, please leave a comment.
Regardless, I think it’s too much for the typical user.
Do you have the base tool specific to Chrome OS, the extensions which are specific to Chrome, and then Add-Ons specific to the Google Suite of tools? Yikes.
Okay, what about Google Slides?
Same thing as above. It doesn’t matter what you’re using. The tool will run if it’s within Chrome.
Best snipping tools for Chromebook

There are plenty of snipping extensions that you can download for your Chromebook through the Chrome Web Store.
Quickly glancing through, I noticed that a lot aren’t regularly updated or the developer is not responding to the complaints of users in the reviews.
I tested a dozen or so extensions and these are the ones that look the most promising in my opinion.
They’re all free, easy to use, and suitable for clipping whatever you want on your screen.
They vary slightly in features, but overall these are all generally good snipping tools that are 100% compatible with Chromebooks.
Isn’t that how it should be? Install. Click button. Snip page. Done.
Note that since these are CHROME extensions, they don’t work outside of your web browser, so you’re limited to just clipping just Chrome screenshots.
If you need to clip something outside of Chrome, use the built-in tool or a Play Store app.
As with any Chrome extension, you should do your own research- read reviews, check the features, check the privacy policy, etc. Find one that suits your purpose.
Snipping Tool For Chromebook
As the name implies, this tool does what it says. A basic, no-brainer Chrome extension that’s no-frills.
One thing about this tool is that there’s no hotkey for it.
You need to press the Launch key, then search for “snipping tool” to see it.
You’ll then see the tool start up with a familiar overlay that looks just like Windows!
You can choose from different cropping tools to suit your need:
- Rectangle
- Crop just a window
- Full-screen snip
- Or free form which lets you clip anywhere
- Hit “ALT + M” to choose your clipping mode, then snip away. You can save the snip to your machine, or you can paste it elsewhere.
- Tip: Use the Shift key + arrow keys to select the area to clip when you use the rectangle tool.
Screenshot Tool – Capture Editor
Do you hate having to create a new account just to do something so simple?
This tool is no registration needed! It’s completely offline so you can use it right away.
You can snap pics and then choose to select an area or whole page screenshot. It comes with basic tools like cropping, adding captions, arrows, tt, or even paint tools.
It just takes one click to snap your pic with no online resources needed. It doesn’t send your screenshot to any servers so it can work offline, at least from what I gathered while testing the tool.
There are also no file size restrictions so you can basically capture pics in full resolution.
It’s so easy to use, plus no logins are needed! Just click the extension icon when you’re ready to capture, pick where you want to screenshot, then save it to your Chromebook.
This snipping tool is completely free to use.
It has some cool features that other extensions will charge you for. If you want something that just works right when you install it, this is it.
Check it out here on the Chrome Web Store.
SimpleShot
SimpleShot is a lightweight web clipper for Chrome.
Similar to the other extensions, you just click the button and then it can capture your current tab, taskbar, or any other apps you have launched.
It also doesn’t screenshot the mouse cursor, so you can eliminate distractions when sending screenshots to others. It’s also more professional that way.
No one wants to see the pointer covering some text or over a picture. That’s just annoying.
Something you should note is that this extension downloads the image that’s in your Chrome cache, rather than creating a new image.
This allows for instant downloads. It’s very lightweight and takes up less than 1MB at the time of this writing. A single button for a clip. That’s it! No ads. Offline compatibility.
Plus, it’s easy on the permissions- it only allows access to the current tab for privacy. Automatic naming for new files as well. Customizable settings with keyboard shortcuts to launch it.
Screenshot Easy
With over 10K users, this snipping tool extension for Chromebooks is well-rated. It currently has a 5/5 review total, making it the highest-rated screenshot tool on the list.
It’s free, easy to use, and includes editing tools built-in. Click the extension, choose your screenshot area, then edit your screenshots instantly when taking them.
Handy Screenshot
This is as easy as it gets. Simple and basic.
Just click on the extension button then drag and drop your clipping tool.
There are some glitches with it on some sites, but it works for the most part. If you’ve ever used Clipular, it’s pretty much the same.
The only gripe I have is that it defaults the filenames to a default name, which means you need to resave it if you want to rename it.
Otherwise, it’s as easy as it gets. No right-click context menu support.
PicFlip.io
PicFlip is a simple-to-use screenshot extension that lets you capture, print, edit, or save screenshots. You can choose from not just jpeg, but also GIF, PNG, and even as PDF.
You can do a partial selected area of your screen or the whole thing.
There’s also a caption/annotation tool so you can add text to it. Unlike a lot of other tools, you don’t need internet access to use this screenshot too.
The images are saved instantly after you capture them.
They download to your Chromebook’s Download folder and don’t get uploaded. Some features are paid, including the PDF version or adding text, arrows, blurs, and other filters to your pictures.
The basic version works as a basic tool. If you need the ability to upload to different cloud services or even send it to OneNote, you can do so with PicFlip.
Snippyly
Funny name, but a serious tool.
This is one of the highest-rated screenshot tools that let you capture your screen, do markups, comments, or share it with a generated link.
You can get things done in one place because it lets you turn web pages into documents that allow your group to quickly add comments or do markup in one place.
You can capture your Chromebook’s screen then share it with a link in a single click (yes, it’s literally one touch of your touchpad).
No setup is needed!
The tool is actually made by former Google employees, so that’s pretty unique.
The screenshots you take are fully encrypted.
This tool is geared towards collaborative work where you work with others, sharing ideas visually and marking them up together simultaneously. It could be overlooked for a single person.
But hey, try it out. Get it on the CWS.
How to screenshot on a Dell, HP, Samsung, or Acer Chromebook
It doesn’t matter if you’re using an HP, Acer, Dell, Samsung, or whatever other make or model of Chromebook.
They all run the same OS (ChromeOS) so it all works the same- assuming they’re on the same version of it.
The brand, model, make, etc. all don’t matter since the operating system is same.
It’s like asking “how do I screenshot on iPhone 12 vs. 13?” They work the same because they’re the same OS. (Perhaps I should’ve used Android instead as an example.)
By the way, did you know you can link, get texts, and send them straight from your phone on your Chromebook?
Pair that up with a sweet LTE connection and you’ve got it made.
Use the steps outlined prior in this guide to clip your screen easily.
My snipping tool isn’t working on my Chromebook
If the snipping tool isn’t working, here are tips to fix it:
Update your Chromebook to the latest version of Chrome.
Google releases updates often that fix a lot of bugs. It also helps improve the security of your device.
If something’s broken, there’s a chance that your Chromebook needs an update.
This is especially if you haven’t shut it down completely or restarted it in a while. Chrome OS needs a full reboot in order to update.
Sometimes a fresh restart will fix the tool.
Use the menu and restart your Chromebook completely. This does NOT mean just closing the lid and then opening it again.
That doesn’t clear the cache, RAM, or other components that could have some glitchy bug or lingering data going on in the background.
You need to completely shut it down then boot it back up. Besides, this will let your system fetch new updates.
If you’re using a snipping tool extension through Chrome, check that you have the latest version of it. You can go to the extension page and check the version history to see the update changelog.
If you have the newest version, restart Chrome then check to see if the tool fixes it.
If not, post a comment on the extension page to let the developer know there’s a bug that needs to be fixed. Explain the bug in detail.
If the developer is somewhat active, they’ll get to it, fix it, then release an update.
Report the issue on Google Product Forums.
You can start a thread about the problem you’re experiencing and get helpful suggestions from other users.
They can test it out too, which lets you find out if it’s just you or a common glitch. They can also replicate it and then possibly help you find a tech solution.
When posting, include as much detail as possible:
- How to replicate the glitch
- Your Chromebook’s model and make
- Screenshots or videos of the glitch
- The version of ChromeOS you’re running
- Names of extension if using one
- Other helpful info
If you provide enough info, other people can help you out. It may even get enough attention that it gets a dev involved!
Remember that these people are just like you, so be kind and describe your issue in detail. Don’t push for a solution. They’re working for free.
Other guides
Check out these other tutorials written by yours truly:
- Right-click on Chromebook
- List of Chromebook keyboard shortcuts PDF
- Record your screen on Chromebook
- Chrome extensions for Students
- Tips and tricks for productivity
Now you can snip all the memes you want on your Chromebook

If you’re used to Windows, you can see how Chromebooks are a little different when it comes to snipping a screenshot. But that’s just the flavor of Chrome.
It works the same way as pretty much any other snipping tool. Now you can harness it for school, work, or personal use.
Snip cool pictures on Chrome. Snip paragraphs of text on Google Docs. Snip a Slide on Google Slides. You can do it all, friend.
Do you have any questions? The snipping tool is pretty straightforward on ChromeOS.
If you can’t get it working, feel free to post your comments below and I’ll try to get back to you!
Or if you found this guide helpful, please let me know as well. Consider telling a friend!
Got any other tips or tricks to share? Let your fellow readers know by leaving a comment.


