Want to completely uninstall Google Chrome?
Here’s a complete guide to turning your laptop into a PC!
Google Chrome is now the most popular web browser in the world.
Chrome has overtaken both Firefox and Internet Explorer. Though, this isn’t any surprise.
It’s known for its speed, simplicity, and security.
All of which are features many users look for in a web browser, which is probably what made it so popular in the first place.
But sometimes, you may just want to remove it because of many different reasons. Whatever the case, this tutorial will cover it step-by-step to uninstall it completely from your computer.
Last updated: 3/8/23. Updated for accuracy. If something doesn’t work for you, let me know!
.svg/2000px-Usage_share_of_web_browsers_(Source_StatCounter).svg.png)
However, Chrome is far from perfect.
There are still security issues and bugs that are discovered and patched, even some dangerous Chrome bugs that were recently fixed. If your instance of Chrome is running poorly, reinstalling may fix it.
Thankfully, it’s quite easy to uninstall Chrome. However, uninstalling Chrome completely needs some extra work.
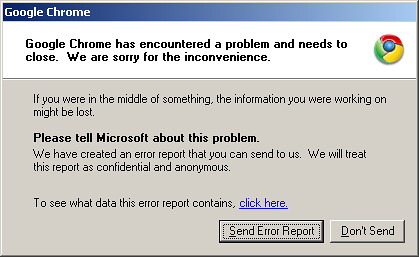
You may want to completely uninstall Chrome for a variety of reasons, some of which include:
- Chrome constantly crashes for no reason
- Chrome is running super slow
- Chrome doesn’t start up or open when you launch it
- Chrome displays a “your preferences could not be read” error constantly
- Chrome is infested with ads or stuff you don’t remember installing
- Chrome shows other errors or doesn’t play videos
- Or you get the “didn’t shut down correctly” error
This guide will teach you how to completely install and remove Chrome so you can reinstall it, or try another browser.
Usually, a quick reinstall will fix the problems and errors you have with Chrome. You’ll need to uninstall Chrome and the additional files and folders Chrome leaves on your Windows PC.
If you just want to reinstall the browser, this guide will serve you well. Just uninstall and then reinstall it. This usually fixes a bunch of problems and bugs that you may be having with the browser.

OK, so let’s get started!
How to uninstall Chrome on Windows

Disclaimer: I take no responsibility for any damage, loss of information, malfunction, or any other thing that may happen to your machine. Although nothing should happen, I don’t want angry readers saying I messed up their device and now they’re typing from a toaster.
Warning: This procedure will wipe your personal profile settings and information. This includes your bookmarks, settings, passwords, browsing history, autocomplete information. But then again, you want to completely uninstall Google Chrome, so it’s a requirement.
You can backup your bookmarks if you have a lot using the menu option for it- if you’d like.
OK, no more warnings. Let’s uninstall Chrome!
Step 1: Uninstall Google Chrome from Windows
Go to your Control Panel (Start Button > Control Panel). Depending on what version of Windows you’re using, it may be tucked away in a menu somewhere, so just poke around until you see it.
If you’re not familiar with finding the Control Panel, Google it.
After you’ve found the Control Panel, click on “Programs and Features”, also known as “Add/Remove Programs.”
If you can’t find any of this, just press the Windows Key + R and you’ll see a box pop up that says “Run.”
Type in “appwiz.cpl” without the quotes and press Enter.
It’ll automatically bring you to where you should be. All caught up? Good.
Step 2: Find Google Chrome and uninstall it
Scan through your list of installed programs and look for Google Chrome. Click on it and then click “uninstall.” It should be at the top of the list within a border.
You’ll be prompted with a few dialog windows asking if you’re sure you want to do this, just go ahead and proceed.
Step 3: Wait for Chrome to uninstall
Chrome will automatically do all the dirty work and uninstall itself. When it’s done, you’ll see a prompt stating Chrome was uninstalled.
Step 4: Now that you’ve removed Chrome itself, you need to uninstall the Chrome folders
Uninstalling the folders Chrome leaves behind is slightly more tricky, but it’s easy if you just follow this guide.
Go back to your Control Panel, and click on “Folder Options.”
Click on the “View” tab. It should be near the top right.
Check the “show hidden files” option.
Uncheck the “hide protected files” option. And then confirm it by clicking “OK.”
Step 5: Now you need to delete Chrome files on your Windows machine
If you’re running Windows 7, 8, or Vista:
Go to:
C:\Users\YOURNAME\AppData\Local\Google\Chrome
And delete all the folders and files that exist in that directory.
Then go to:
C:\Program Files\Google\Chrome
And do the same thing. Delete all the Chrome files and folders.
If you’re running Windows XP:
Go to:
C:\Documents and Settings\YOURNAME\Local Settings\Application Data\Google\Chrome
And delete and remove all the Chrome folders and files.
Then go to:
C:\Program FIles\Google\Chrome
And delete and remove all Chrome files and folders.
Now that you’ve deleted all the Chrome files and folders, there should be no traces of Chrome left on your machine. There should be nothing left for the casual user to ever find- but we’ll take it one step further and write over the deleted files.
Most computers will “flag” a file for overwriting after you delete it. In other words, it still exists, but only until it overwrites it with other data. You can’t see it, but it’s still there.
If you overwrite it a bunch of times with gibberish data, it’ll be gone if the data is written over. Your computer will use the “flagged” space.
So while Chrome and its files are removed from your computer, there are still traces of it in the registry, orphaned files and folders, and data left behind that can be written over.
You’ve uninstalled Chrome and all the files Chrome left behind. You’ve removed Chrome data and profile information. There should be nothing of Chrome left on your Windows device.
Uninstalling Google Chrome completely and removing Chrome files and folders
If you really want to be thorough, I recommend downloading CCleaner.
It’s completely free and has a nifty utility scan that will check for leftover files and system registry keys that programs often don’t uninstall by themselves.

If you decide to install CCleaner, here’s a quick guide to removing Chrome using CCleaner:
Step 1: Download CCleaner
You can download it here.
Step 2: Perform a registry check
It’s the second tab down from the first tab and it’s labeled “Registry.”
Step 3: Make a backup of your registry when it prompts you
It’ll automatically ask you if you want to make a backup of your registry, go ahead and make one.
Step 4: Let CCleaner check your registry for unused keys
It’ll analyze, scan, then gives you a report and a recommended action.
You’ll probably see a huge list of unused keys if you’ve never used CCleaner before. You can go through each key one-by-one and choose what want to do (it’ll probably suggest deleting that registry key), or you can let CCleaner fix everything automatically.
The option is up to you. If you know what you’re doing, you may want to manually go through it. If you don’t, I’d suggest to let CCleaner do it automatically.
Step 5: Restart your computer
Restarting your PC will clear the caches and RAM. It’s good practice after removing programs or installing major programs or updates.
You’ve now uninstalled Google Chrome completely from your Windows PC
Your Windows PC has now uninstalled Chrome, removed all personal data, removed all Chrome shortcuts, icons, and quick start options, removed all Chrome folders and files, and deleted all Chrome registry keys.
Your Windows device should now be Chrome-free. Congrats.
Now, it’s up to you to decide to reinstall Chrome or to try another Internet browser. If you decide to try something else, I’d suggest Firefox, as it’s probably the closest browser to Chrome. Firefox has a huge assortment of plugins (similar to Chrome’s web apps) and is also capable of running the most modern websites.
My only complaint is that Firefox is a lot slower to startup compared to Chrome. That’s about it. However, that’s just my opinion. I usually use Chrome for everything and Firefox for compatibility for some sites that Chrome seems to render weirdly.
Anyway, you’ve uninstalled Chrome now and wiped all files and folders. You can safely reinstall Chrome if you’d like, or choose another browser. Be sure to restart your computer for before you install a new browser.
Whatever you do, just don’t use Internet Explorer. Seriously. Don’t use it.


Worked for me with windows 10 1909 update! had issues with passwords not populating in my password list, and not auto filling. Had to do all steps including Ccleaner registry fix.
Once i did that, re-installed, it was working again!
You rock! Thank you for writing this, made fixing this quick and easy, instead of trying things and troubleshooting for a couple hours.
You’re very welcome! I’m stoked you got it working and patched up your autofill passwords!
And thanks for the kind words =]. This is why I write.
Please let me know if you have any questions!
This was very helpful, and worked perfectly!
Hey Rarity,
Glad that you discovered it to be helpful and stoked that you got it to work!
And thanks for the kind words- this is why I write!
Let me know if you have any questions.
Thanks.