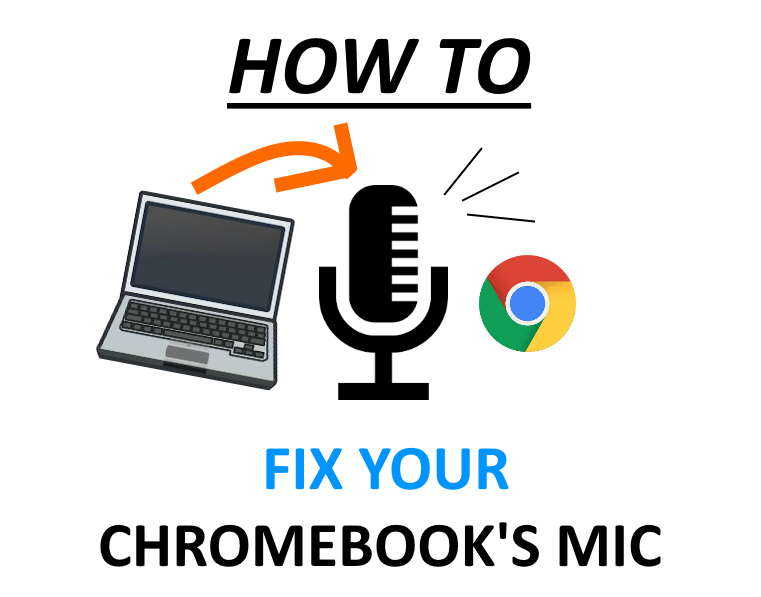
So, your Chromebook’s microphone isn’t working correctly.
Does it not register your voice? Are the settings for it missing? Or do you just hear loud static in the background?
Whatever the case, let’s dive in and troubleshoot a solution to get your mic working how it should be.
In this guide, we’ll talk about:
- Common issues why the microphone doesn’t work
- How to get the mic working again
- Tips to fix static, background noise, and get the best possible audio quality
- Other common ChromebookFAQs and microphone bugs
If you still can’t fix it after going through this page, or have any questions, just leave a comment below and I’ll see if I can help you out!
Sound good? Let’s fix your mic!
Is there a microphone on Chromebook?
Yes, most Chromebooks come equipped with an internal microphone.
(If you’re here, you probably already know that. But I wanted to make this guide newbie-friendly for newcomers hopping on the bandwagon.)
This mic is built into the webcam or under the keyboard, which is used for online conferencing xyz, video calls, or voice recording xyz.
But sometimes, the mic settings are way too low for it to pick up any sounds (or your voice) and needs to be adjusted.
Or it could be broken/defective entirely. Let’s see if we can find out why it’s not working and troubleshoot it.
Why is my microphone not working?
There are multiple reasons why this may be happening.
Some of the most common reasons why the mic doesn’t work on Chrome OS are:
- Microphone sensitivity too low
- Blocked permissions for specific sites or apps (you may have blocked access)
- Restrictions from a managed/enrolled network xyz
- Defective or dud microphone (check that warranty!)
The first things we’ll check are your mic’s settings, hardware, and other common troubleshooting areas to see if there’s anything suspicious.
Microphone sensitivity can be a hidden culprit as to why it doesn’t detect anything.
How do I allow Chrome to access my microphone?
You’ll want to check that you didn’t block a site from accessing your Chromebook’s microphone.
This is easy to do and Chrome keeps a running list of sites that are currently blocked so you can easily check your blocklist.
Here’s how to unblock the mic:
- Open Chrome
- Click on Menu > Settings
- Look for “Privacy and Security”
- Find “Microphone” and click on it to expand the options list
- Examine your list of blocked sites.
You’ll see a list of every single online app or site you’ve restricted access to your microphone.
If you need to enable access, click on the trash can icon next to the site to remove it from the list of blocked sites and enable mic access again.
Tip: You can quickly jump to this page by typing in “chrome://settings/content/microphone” directly into the address bar.
If you don’t want to mess with this in the future and you want all web apps and sites to be able to access your mic by default, just turn off the permission “Ask before accessing.”
This will then allow your microphone to instantly work with any apps or websites in the future.
Note that this does pose some privacy concerns- if you’re on a sketchy site they may be able to pick up your voice or other sounds in your room.
Not to mention that many people already know computers spy on our voices all the time xyz!
If you’re still stuck, here’s the official guide from Google’s help page.
How do I test my microphone on Chromebook?
The easiest way is to use a Chrome extension that allows you to check if the microphone is working.
A simple, free, and straightforward one called “Microphone Test” does exactly what it says on the tin.
You download the extension and it’ll take you to a page where it’ll attempt to connect to your mic on your Chromebook.
Try speaking into the microphone and see if it picks anything up.
You’ll see the waveform appear on the screen if everything’s good to go. Otherwise, you’ll see nothing if it can’t find your microphone.
This web app has no download, accounts, or need to install required.
Plus, it’s free to use and also doesn’t make you create an account just to test your mic.
Another Microphone Test that can be used is to assess the quality of your audio.
You can check where that background static is coming from.
Some people report that they hear a “white noise” in the background that sounds like annoying, loud static. Use this tool to inspect the root cause of the sound distortion.
For instance, you hear some static when you listen to yourself talk (or other people in the meeting are telling you). Test it with the tool and see if any waveforms are registered.
If not, then you can right off the bat eliminate that it’s not from the site or app that you’re using, but rather from your microphone. Perhaps it’s falling apart or just low quality.
Some mics will register your voice and some static every time you speak. Others may have this constant buzzing sound in the background like a drone.
As you know, Chromebooks are budget laptops and you can’t expect the best microphone quality (along with the webcam, keyboard, and even speaker quality xyz).
Where’s the microphone located on a Chromebook?
The microphone is typically situated right next to the webcam.
You’ll find it on the right side of the lens built right into the screen.
If you check very carefully in this area, there’s a small pinhole that allows your voice to enter the bezel and register. Some models may have the unit hidden inside the bezel or under the keyboard (older laptops).
Remember to not speak inches away from it- there’s no need. This will ensure you get the best quality.
Talk naturally as you would with a real-life person. You don’t need to do anything special. Just speak normally. Pretend the mic doens’t exist.
How do I get my microphone to work on my Chromebook?

Here are some tips and tricks you can try to fix your internal mic.
Try going through this troubleshooting guide from the start to the finish. The various fixes get more complicated as you move down the page, but you may be able to resolve the problem before you get there.
So double cross your fingers and let’s roll.
Ensure your audio input settings are good to go
The last thing you want to do is spend an hour trying to fix your audio-only to see that the permissions for microphone access were disabled or you had the site blocked the entire time.
Go to the Chrome settings page and verify that your mic is indeed enabled and that whatever site you’re trying to access isn’t on the blocklist (list of sites that don’t have permission to your mic).
Disable extensions
The first thing you can do is disable your extensions one by one to see if the sound magically fixes.
Audio conflicts happen. You can comb through your list of web extensions and apps to see what’s causing the problem.
Or you can just use Guest mode, which we’ll cover next.
Use Guest mode
Guest mode will allow you to use your Chromebook without the inference of apps that could be hijacking or messing with your audio input.
To sign in as a Guest, just log out of your primary account xyz and then click on the “Sign in as Guest” option at the bottom-left of the login page. It’s browsing your entire session as somewhat of an incognito (private) mode- no Chrome extensions or Play Store apps are active.
See if you’re able to register the microphone and get it working again. If yes, then you know for sure it’s some app running in the background that’s stopping it.
Perhaps an app audio conflict where two apps are trying to access the audio simultaneously?
There have been some reports xyz from users that sometimes an app doesn’t shut down properly and runs in the background.
So when you attempt to launch your Zoom meeting or Google Hangouts, the mic won’t work because conflict is going on.
Guest mode will eliminate this possibility and you can comb through the apps one at a time to see what’s causing the audio to fail and not register your voice.
Change the input source
The source of your audio also makes a difference.
This is a quick way to eliminate defective hardware.
Try switching to a USB external microphone, Bluetooth headset, or even those free earbuds that come with your phone.
If it suddenly works on a different device, then you know that whatever you were using before is defective or incorrectly configured.
For Bluetooth headsets/mics, don’t forget to CONNECT it properly to your Chromebook.
For USB devices, try different ports- it could be the mic or a damaged USB port.
For devices that plug in to the audio jack, try different ones. It could be that the jack is damaged or the earbuds themselves- pretty common when you accidentally pull or yank on the wire when it’s still connected to your Chromebook.
Also, make sure that your Chromebook isn’t trying to pick up a Bluetooth headset when you’re trying to use an audio jack plugin pair of earbuds.
And that you’re not using a pair of earbuds when you’re trying to use a Bluetooth headset. Common mistakes that happen more often you think.
After doing this, you should be able to find out if the audio bug is related to just the headset or your Chromebook entirely. If one headset works and another doesn’t, then it’s something wrong with that particular audio source.
But if it doesn’t work no matter which audio peripheral you use xyz, it could be a driver or setting bug. We’ll have to find out.
Try a different online conference software
Sometimes the issue comes from a single online software that you’re using to conference.
Whether it’s Zoom, Skype, Google Hangouts, Google Classroom, GoToMeeting, etc., you should try using different ones to see if the problem persists across all of them.
This is a quick way to eliminate if the problem is with your hardware or with the online software. From this, you can move to the next step to resolve the issue:
- If the problem is with a specific conference platform, then contact their support team for a detailed resolution. Let them know that you’re using a Chromebook with as much info as you can provide (Chrome OS build version, model, brand, microphone hardware, external microphone or headset, etc.)
- If the “no audio” problem persists across ALL virtual meeting software, then it’s likely a problem with your Chromebook’s audio settings, microphone, or other hardware. You’ll have to use the process of elimination to find out what exactly is causing the issue. Keep reading.
Try the Beta channel
When a Chrome update breaks things, you can always opt into the Beta channel to see if that corrects the problem.
If your mic used to work but then suddenly stops working after a recent Chrome update, try opting into the Beta channel.
That may resolve the issue as it uses a yet to be released version of Chrome which addresses many of the bugs on the current release.
To do this, launch Chrome, click on Menu > About Google Chrome > Additional Details > Change Channel > Beta/Developer (unstable).
This will put you into the dev channel, which is a testing environment for new features.
Regardless, some users reported that they were able to fix the static or non-responsive mic with this trick xyz.
Note that this will wipe your Chromebook and delete everything you have saved on it- your Downloads folder, wallpaper, settings, etc. So it’s wise to back up the data you want to keep xyz.
Everything stored online on Google’s servers will remain intact (Drive, Gmail, etc.) For more details, check out this article xyz.
After you enter Chrome OS Beta, check if your microphone works by doing a test.
Powerwash it
This goes hand in hand with using the experimental channels.
Powerwashing your Chromebook completely deletes everything and restores your device to factory settings. If you need to erase your Chromebook but ensure you’ve tried everything else first.
Oh, and don’t forget to make a backup of the important files you want to keep. Just like enabling the Beta channel, this also resets your SSD to factory settings.
If you need specific steps, I wrote a post that outlines all the common FAQs about Powerwashing xyz you may find handy.
How to enhance your mic’s audio quality

If your mic registers but just has terrible sound (maybe your colleagues or peers comment that you’re always fading out or “sound far” from the mic), there are some things you can do to enhance the audio input instantly.
Here are some tips to get crystal clear sound through your Chromebook’s microphone:
Sit at the right distance from your device
Sit in a neutral position an arm’s length away from the laptop.
I’ve seen some people hunch over when speaking into the camera during an online chat. There’s no need to do this.
If you can’t see the screen, tilt it back so you can.
Don’t talk directly into the mic
When you speak directly into the built-in mic, you’ll get a lot of distortion.
You can try this by blowing into your phone’s speaker. It’s the same thing.
You don’t need to put your face in front of the microphone nor do you need to “point” your mouth’s words towards it. Just speak normally as you would if there was someone else in the room with you.
No need to speak like you’re a robot or something.
Don’t speak too loudly or too quietly
Speaking either too quietly or loudly will both contribute to some poor audio quality.
If you’re getting a lot of bass notes and blurry audio, speak softer or sit further back from your laptop. It’s not made for up close talking.
You don’t have to bend your head down (which is a terrible posture) just to speak “into” the computer.
Sit up straight and converse as you would with a normal person in the room.
This will make your voice sound much clearer.
If you’re too quiet, just stay in the same position but speak a bit louder. That’s all there is to it.
This should fix any volume related issues on your Chromebook’s microphone.
Use an external microphone (Bluetooth, USB, or headphone jack)
Always consider using an external mic.
This will eliminate the possibility of the audio issues being a problem with your Chromebook’s hardware or some kind of audio driver update. It’s true.
There have been owners complaining that their audio suddenly sounded like a loud TV’s static noise after a recent update to Chrome OS xyz.
By using an external mic, you can find out what’s the reason behind the poor audio quality.
Get an external microphone (whether it’s Bluetooth, USB, or an inline mic that plugs into the audio jack) and run some microphone tests.
See if the same problem persists. If it’s still blurry or crackly no matter what device you use, it could be because of a driver problem. There’s nothing you can do about this until Google patches it.
You can try to roll back to an earlier version of Chrome xyz or post in the Google support forums so they’re aware of it xyz. Or you can send feedback directly to the team xyz.
However, if the static disappears after switching devices, then you know it’s just a hardware problem.
Toss that garbage mic and use the good one xyz using the built-in bug reporter.
Adjusting microphone settings
Chromebooks recently got a new update around April of this year (Chrome OS 81) that added a volume adjuster for microphone and headphones in the system tray.
If your mic suddenly stops working after an update, try doing the following steps to resolve it:
- Click on your picture at the bottom right corner
- Look for the small headphones icon in the system tray and click on it
- Adjust your microphone input and volume output as desired
Note: If no headphones are detected, you won’t see this icon. You can adjust the output using the slider though.
This is an easy way to fix common audio bugs like the following:
- You can’t hear anyone during Zoom or Google Hangout meetings xyz
- You only hear static when someone speaks
- They can’t hear you
- People say you’re too loud
- Your mic doesn’t pick up your voice
Try adjusting the input/out levels on your headset if you have one connected using the system tray function.
This was recently added, so it confused a lot of people who were used to the default functionality.
Note that if your sliders are too low, your mic may not pick up your voice or you may not hear anyone speaking.
Changing microphone volume usually resolves most of these issues, assuming you’re on the latest release of Chrome OS.
My voice sounds crackly or there’s a ton of background static

If your system picks up static or background noise, follow the steps above to fix it (sit at the right position, don’t talk directly into the mic, speak naturally, etc.).
Work in a quiet environment, preferably away from walls and other hard surfaces which tend to resonate sound (make it bounce and echo).
Static may be fixed by either swapping your hardware (try using earbuds or a dedicated USB mic), making sure that you’re on the latest release of Chrome OS, or trying the Beta/Dev releases.
Get a dedicated microphone for crystal clear sound
From what I read online, most of the static noises can be fixed just by using a dedicated microphone.
You can pick these up for cheap on Amazon xyz.
They plug into your Chromebook by USB and sound a lot clearer than those cheap inline mics built into the earbuds you find at the dollar store.
When you plug in the mic, be sure to change the sound input to the dedicated external microphone and the sound output to either the onboard speakers or headphones xyz.
I suggest using dedicated headphones so the mic doesn’t pick up your speaker output which results in people hearing themselves over meetings (echo echo echo).
But I don’t have a USB mic!
However, if you don’t want to buy a microphone and would rather stick with a pair of earbuds you already have, try using your Chromebook’s internal mic for the sound input, and your earbuds as the sound output- NOT the onboard speakers.
Just click the system tray at the bottom-right (where your picture or avatar is), then click on the headphones icon at the bottom and select “INTERNAL MICROPHONE” for the sound input and “HEADPHONES” as the output.
This should eliminate a lot of sound problems right off the bat.
Fixing the popular Zoom audio bug
There’s a known bug with Zoom meetings where the sound simply doesn’t work when you hop into a meeting. Others can’t hear you.
The solution is this:
- Click on “Don’t connect to audio.”
- Get the join code and meeting ID.
- Connect to the meeting.
- Wait for the meeting to load up.
- Click on “Connect with audio”
- Choose “Computer audio.”
You should now be able to have your mic register when you speak in Zoom.
Did you fix your microphone?

Now you should be able to use your internal mic as intended.
Enjoy your Zoom, Google Hangouts, Skype, or whatever other online meeting xyz software you use.
Speak clearly and boldly as your Chromebook picks up every single syllable that rolls off your tongue and into your computer.
Were you able to get your audio crisp and clear? Did you get your microphone working?
If you need help, post a comment and I’ll offer some suggestions for you ASAP.
Otherwise, if you found this page fixed your problem, please let me know as well =].
Thanks for reading!
")
")
")
")
Aw, this was a really good post. Taking a few minutes and actual effort to create a really good article… but what can I say… I put things off a whole lot and don’t seem to get nearly anything done.
Thank you so much! I am a laggard techi but your clear instructions have got my Chromebook mic working again. Phew!
hello! i have a chromebook and its my school chromebook. but my mic is really bad. i read this whole article and some of the buttons on here aren’t the same as mine. i dont know how to tell what type of chromebook it is or if there even are different chromebooks (im sure there are) but i have to go on zoom for my classes and i cant speak because no one will hear me! i have to make a flipgrid (which is for videos) for an introduction for my next year of school and my mic doesn’t work. there is so much static in the background that you could barely hear my voice. i adjusted the mic sound which made you hear me just by a little bit but there is still so much static. the earlier the reply the better! thank you!
Hi! I recently bought an inexpensive external USB mic for use with my Chromebox (like a Chromebook, but uses external peripherals). Up until now, I’ve used a USB headset, but I wanted to try the external mic for some conference calls. I plugged in the external mic and it worked just fine. I then got on a conf call, switched the input (and output) source to the USB headset and nobody could hear me. Apparently, the USB external mic hijacked the microphone channel and the only way to use the mic on my USB headset was to unplug the external USB mic. (I eventually connected it to a USB hub with a on/off switch so I can turn it off when I want to use my USB headset.)
Any ideas on what I might be overlooking or is this just one of the perils of trying a cheapie external USB mic? (I’d hate to buy a Blue Yeti or something else that’s expensive and have it work the same way…)
TIA
I’m using a Lenovo chromebook. Got it 2 years ago. My microphone isn’t working. There is no chromebook in India yet. So I couldn’t get it fixed. Since my sister needed microphone for her daily work. I got it from her and power washed it and logged in with my account and microphone worked after that. Previously we tried power wash and log in with her Id first before logging in mine. After power wash and logging in to the same account didn’t work but different account worked. But the same problem started. I’m not sure how to fix it. I can’t power wash and log in with another new id. What can I do now ?
Hey, do you have any advice to fix a broken camera? My camera seems to be dented and scratched and if you say my mic is located inside the lenses it would explain why My Mic is fluttering and making a bunch of weird sounds I am so disappointed with this computer’s camera I can’t be equipped worse.